2006/12/14

How I Make a Shawl - Part 7: Fringing, Embellishing, Wet Finishing, Pressing and Drying

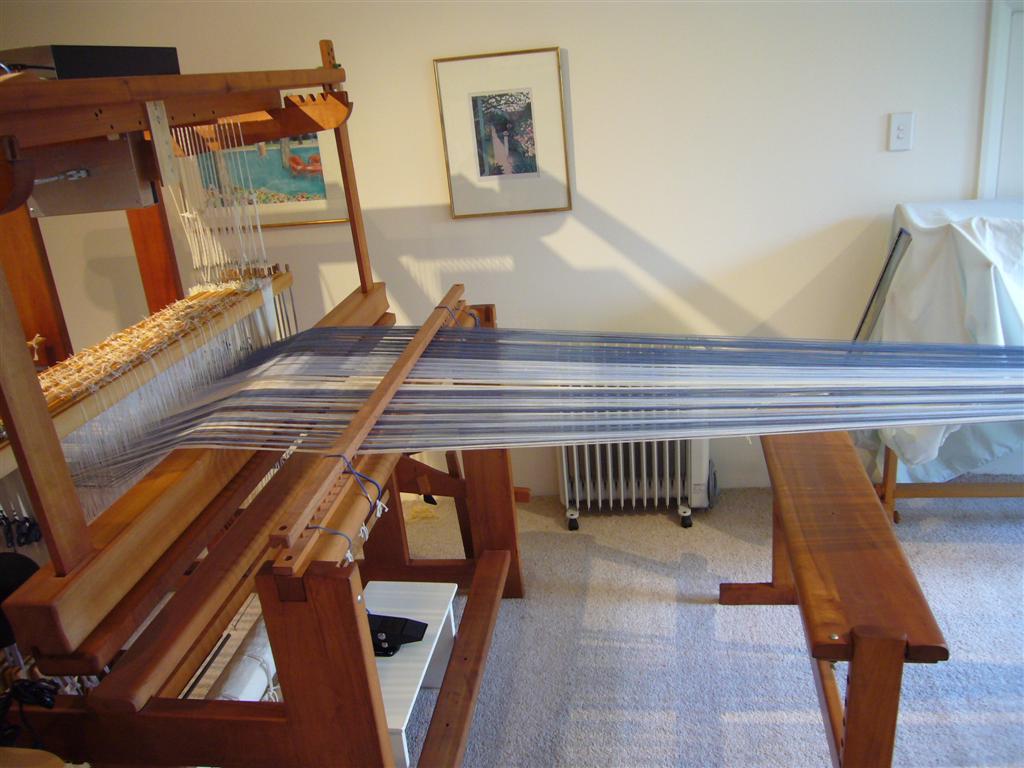
After the shawl rested overnight (or longer), I needed to fringe. This can be an art in itself, twisting, braiding, and weaving the fringes like lattice work, but there were enough interest in the colors and textures in these two, so I made straight forward fringes. The fringes took about 2 hours per shawl, with frequent rests and counting/recounting.

Sometimes I like to embellish the selvedge/s or the fringes with tiny glass beads, which makes parts of the shawls sparkle in the night, but again, I didn't want to make these two pieces too busy, so I didn't embellish them.

Then came the last but very exciting part of "weaving": wet finishing is mostly washing, but in case of wool, it also involves controlled felting, so here I did to wool what your mother probably told you never to do to your brand new sweater.

This is our old bathtub which we had fitted into a cradle. I have the hot water tap in the middle of the garage, just next to the lawn mower, and the cold water and drain at the end.

The very first time a shawl is placed in hot soapy water, it is left alone for about 15 minutes so it can absorb the water at its own speed, and the fiber can open up.

I washed them in hot soapy water roughly, then plunged them into cold water, and repeated the process. I must watch the transformation of the cloth carefully while I wet finish, but normally, with the combination of the yarns I use, the transformation takes place in the second hot wash, and I rinse the cloth carefully in the last cold wash. The first piece on this warp needed another extra hot wash, but the second was, as predicted, a two-cycle finish. I wash every single piece individually for this reason.

The photo above is during the most exciting second hot wash, and if you click to enlarge, you can see how the wiry/netty warp and weft yarns have integrated to become a piece of cloth.

After I squeezed as much water as I could, I spun the shawls in medium speed in my washing machine for a while, repositioned them, and then spun in high speed.

Finally the pieces were steam-pressed over and over while still damp, and laid flat on the living room floor to dry overnight. Wet finishing and pressing took about an hour for each piece.

After the pieces were completely dry, I cut off the frizzy ends below the knot of each fringe, and that is the very last job, which took about 15 minutes for each shawl.

I Used the Wrong Weft!!

I thought I was weaving with a yellow-green 100% cashmere yarn, and though the cloth took on a blueish color on the loom, I thought it was because of the two grays in the warp. I thought nothing of it while fringing, washing or pressing, though the texture did feel slightly stiffer, and the green weft shone more than expected.

It wasn't until I was fishing through my cashmere box that I noticed this cone was labeled incorrectly, and then realized I used the melon-glacé-colored cashmere-silk mix instead. I like the contrast in the sheen, and the way the silk-mix sits slightly above the cashmere warp to show off the weave structure.

For once, Ben was given a piece not because I had made too many mistakes, but because the overall color is one of his favorites.

Men's Cashmere Scarves

Men's mean they are just a little more densely woven, and are wider. Warp in two grays; one scarf is with weft in clear yellow, another in dirty yellow. 100% cashmere.

The clear yellow is a Christmas present from my friend Joan to her friend; the dirty yellow is a present for my baby brother for taking a giant step in his career earlier in the year.

2006/12/07

How I Make a Shawl - Part 6: Finally the Weaving

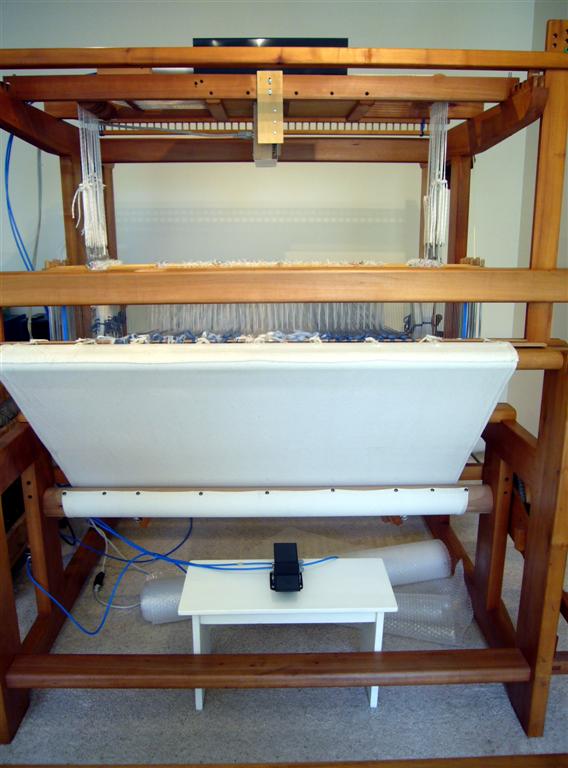
The act of weaving is simple and quick: I stepped on the pedal;

waited for the shafts to lift, (this photo is crocked, but the shafts lifted evenly, or else I needed to tweak the height of the shafts);

threw the shuttle between the lifted and the not-lifted threads, (this space is called the "shed");

and brought the reed forward to position the weft, (this action is called "beating"). Every few inches, I advanced the warp threads and continued weaving.

I wove two pieces of samples, fringed, washed, pressed and dried them to test six weft candidates and five weave structures. I decided on the weft and the weave structure for the first shawl, and wove it, which took a little less than three hours. I decided on the weft yarns, color schemes and the weave structure of the second shawl while I was weaving the first; the weft color distribution took about half an hour to calculate, and the weaving time was a little over three hours on the second shawl.

After I wove the length of the shawl, I advanced the warp enough to get fringes, and cut off the woven shawl. I checked for mistakes or bits of yarn sticking out of the cloth, cut then off, and hung the shawl overnight to rest.

How I Make a Shawl - Part 5: Switching on the Loom

With some looms, non-dobby foot looms, there is another process called tie-up, but because I am weaving this series on a computer-controlled loom, I don't have to crawl under the loom to connect the treadles (foot pedals) to the shafts according to the weave structure; this is a relatively short and straight-forward process, unless you have not enough room under the loom and need to test your contortionist skills. (I do this when weaving on my Jack loom.)

A computer-controlled loom (which is not a special loom as much as it has lots of extra parts) can read a weave structure designed (or downloaded) on the computer, in a graph-like format called a draft, and decide which shaft/s is/are lifted in what order.

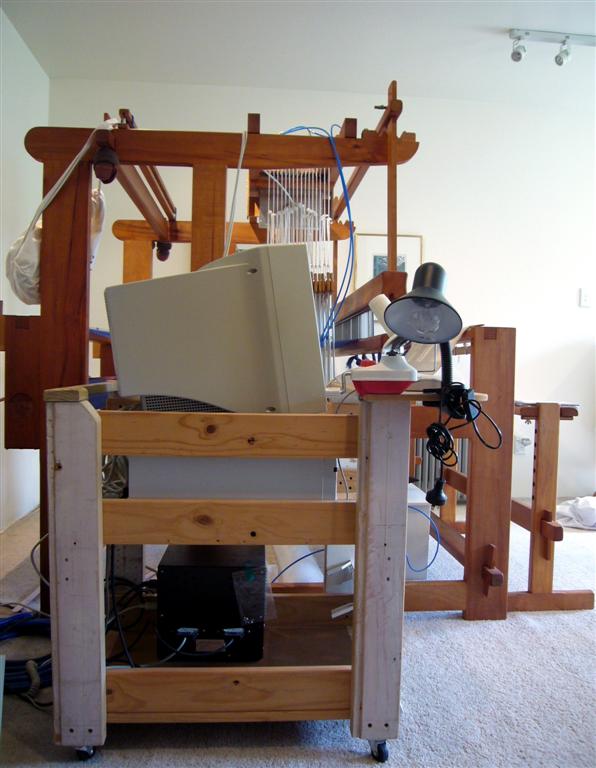
In my case, I needed to switch on the computer, open the program that translates the draft into the lifting order, and select the weave structure I want to sample;

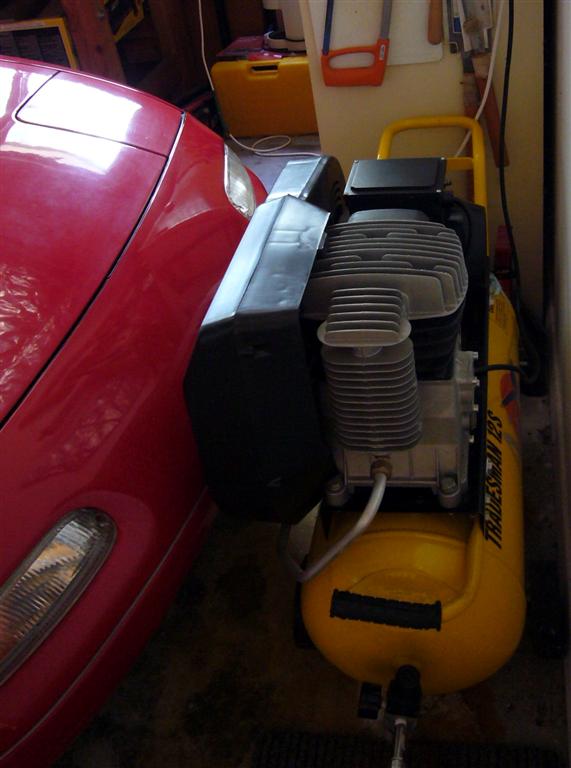
then I switched on the air compressor in the garage to power the physical lifting, (the car is not attached to the compressor; Ben needs to park this close so the garage door can be closed);

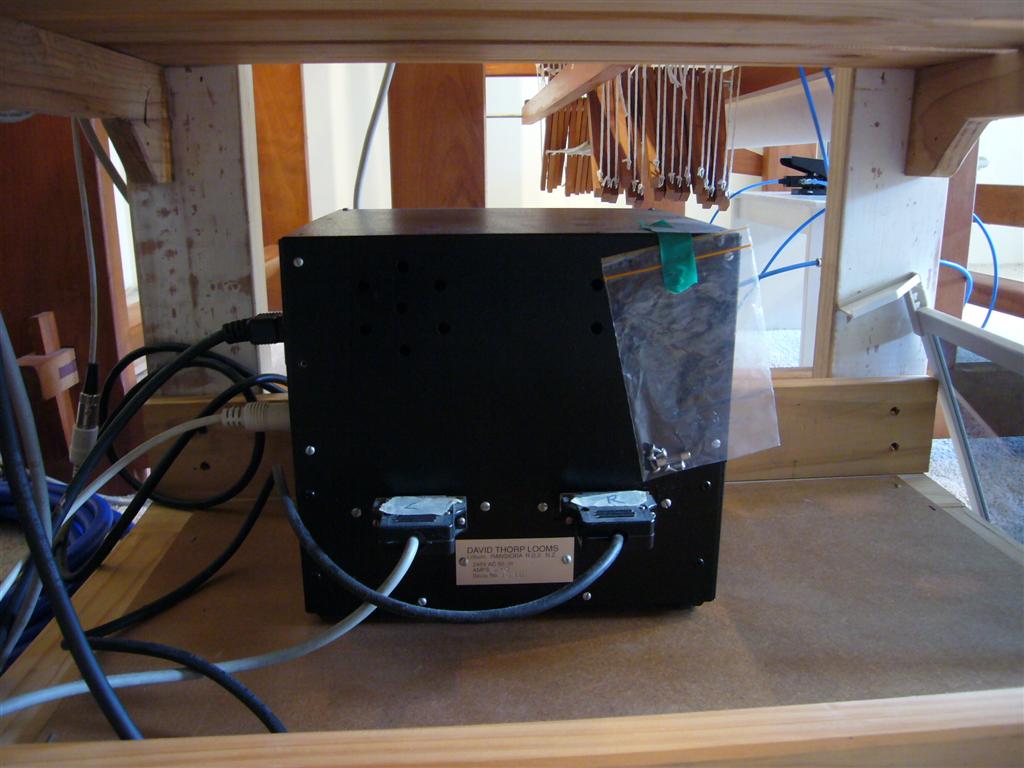
and I switched on the black box which conveys the lifting order to the solenoids.

Oh, and I prepared the weft samples by winding them onto pirns that goes into the shuttle.

My workstation is all ready to roar in less than 60 seconds. (The air compressor in the garage is behind the wall to the left.)

How I Make a Shawl - Part 4: Dressing the Loom - Winding and Through the Reed

Next was the most dreaded, unnerving (for me) part of the entire weaving experience, the winding, the only step where I need Ben's help.

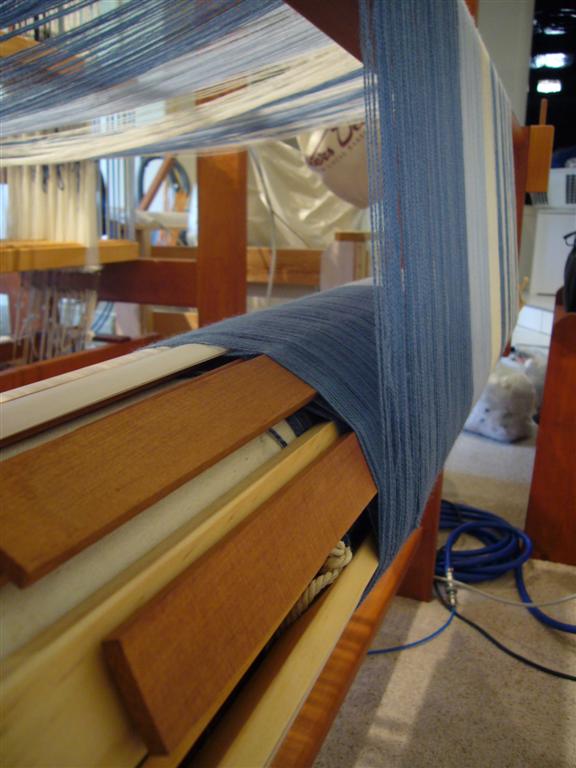
Theoretically, all I need to do is to wind handles attached to the back beam so the warp threads in the warp chain is straightened and wound on to the back beam, which can later be wound forward under tension to be woven. The reality is, warp yarns can get tangled with each other, the threads may be unevenly tensioned, or depending on the type of threads, it can get tangled up with the heddle, and even break, so the winding needs to be done under vary careful and as many watchful eyes as possible. This is the only part of weaving that I really dislike.

But I must wind to weave, so I attached a raddle on the front beam which allowed me to spread the warp relatively evenly to the width of the shawl; Ben held the warp chain, which was gradually undone by him and the threads held under even tension, at the other side of the room, as I slowly wound the warp.

I must have taken this from where I was kneeling while Ben was resting his arms because the warp threads are slack; we watched the back beam, above and below the threads, the front and the back of the heddles and the front and back of the raddle for loose or tangled warp threads. The slats of wood and old plastic Venetian blinds help separate the different layers of warp threads.

We stopped winding when I had about 40cm left in front of the raddle; Ben left the rest of the warp threads hanging and I came to the front of the loom. I removed the raddle, and inserted a 6-dent reed. The reed spreads the warp threads evenly in the exact weaving width; I am using a 6-dent reed, which has six slots for every inch.

I wanted to weave this shawl at 18 ends (warp threads) per inch, so threaded three threads in every slot. When I weave, the bars in the reed helps me push the weft threads forward and into position.

The winding took about an hour; the threading through the reed about another hour. Now I can tie the warp threads on to the front beam, and start weaving. Because I was not happy with the unevenness of the tension, I tied the warp threads directly, tugging at some sections more than the other, fine-tuning the tension.

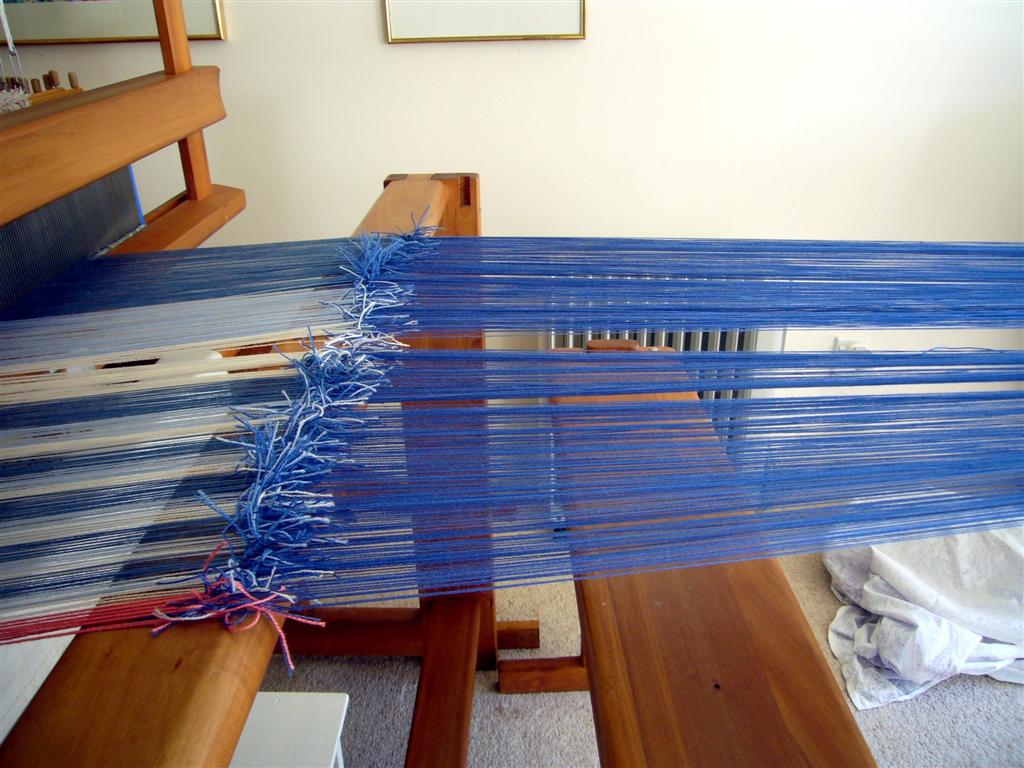
PS. A week later, I tied each new warp thread of the second warp onto the ends of the first warp, thus eliminating the need for threading through the heddles or the reed; the tying took me almost half a day, but this was still a great time-saver. I increased the number of warp threads slightly, so you can see the very long pink leaders, reaching all the way to the back beam, to make up the difference. The second warp is the more intense mid-blue only.

How I Make a Shawl - Part 3: Dressing the Loom - Though the Heddles

Now come three tedious but important steps, which, collectively are called "dressing" the loom.

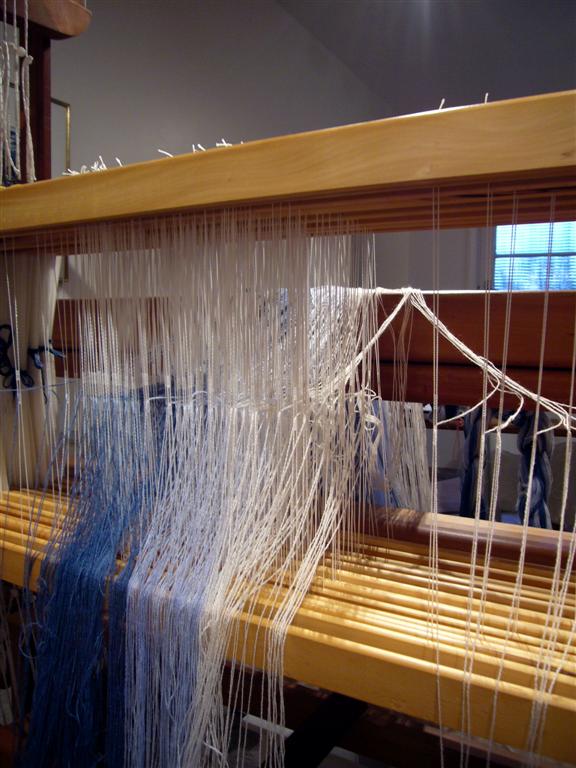
After making a long warp chain and transporting it downstairs, I secured most of the chain to the front of the loom, and stood in the space behind the heddles and shafts, in front of the back beam, and one by one, threaded the warp threads in to the eye of the heddle on the appropriate shaft and in the planned order.

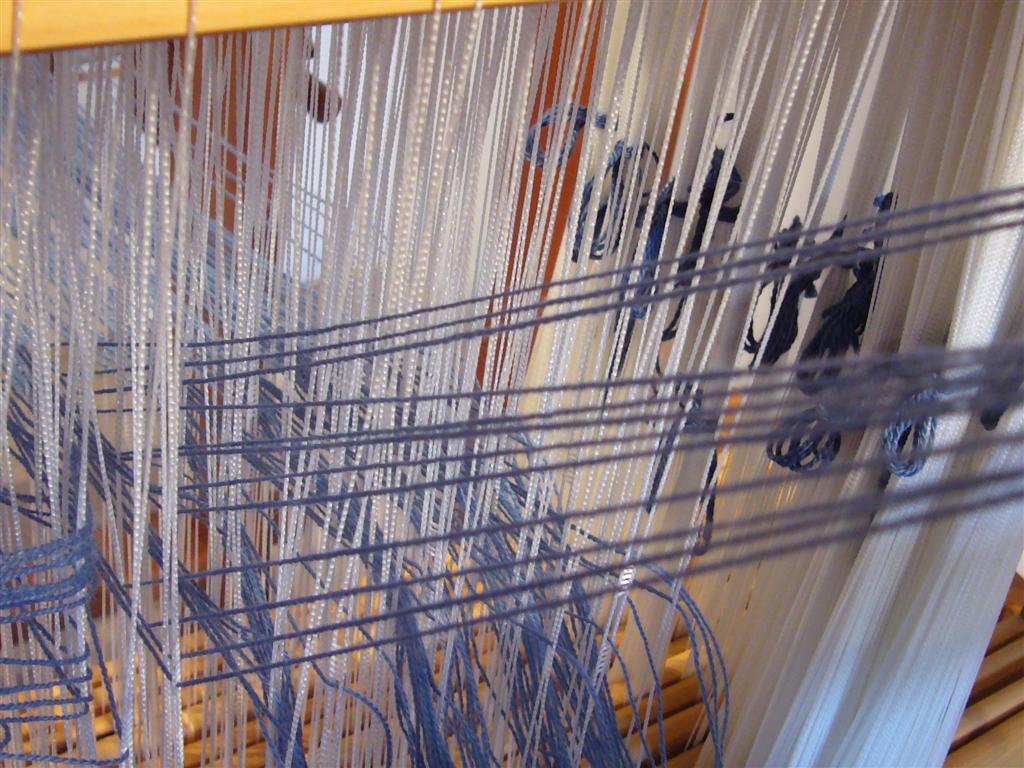
Heddles are the white string-like things with an "eye" though which normally one warp thread is threaded; every heddle is held by a shaft or a harness, (the pieces of wood at the top and the bottom on this loom); each set of heddles on the same shaft behave in unison.

Now, weave structures (or patterns) are created by selectively lifting (and on some looms also lowering) shaft/s so the shuttle and the weft threads can pass through some lifted and some not-lifted (or lowered) threads. You could say that the threading (first thread on the left is threaded on Shaft A, the next on Shaft B...), and the lifting of the shafts create the structure. I know it's getting a little technical, but if you see them in action, it's rather very simple.

I have 16 shafts on this loom, but usually I save Shafts 15 and 16 to weave plain weave on the two edges so I don't have to worry about the weft slipping at the edges, leaving me 14 shafts to play with the weave structure. Because I want to test several structures and weave at least two shawls, I threaded this warp in the simplest and most flexible threading, the straight draw. So, working from behind the shafts, the first warp thread (which will be on the far left when I sit in front of the loom to weave) was threaded through the eye of the heddle on Shaft 16, the one closest to me; the next, on Shaft 15; then the next 494 threads were threaded in shafts 14, 13, 12, 11, and so on to 1, and resuming at 14. The last two, 497 and 498, were on Shafts 16 and 15 again.

Threading the warp threads through the heddles is a simple task, but if mistakes are made, correcting the threading can be annoying, so I prefer to work on only 200-300 warp threads at a time. For this I warp, I worked two afternoons (when the light was better) to thread and check.

When all seemed good, I secured the warp ends to the back beam; because this is a large loom and the loom waste (the portion of the warp that cannot be brought forward to weave) is great, so I added a little bit of what I call the leaders in the end.

The two white threads appearing above the rest were threaded not in the eye, but the space above by mistake. This needed correcting before I could wind the warp onto the back beam.

2006/12/06

How I Make a Shawl - Part 2: Measuring the Warp

The work of a weaver, the preparation, the actual weaving, and the finishing, is linear; that is, the work consists of a series of relatively simple tasks, but each step needs to be done in sequence.

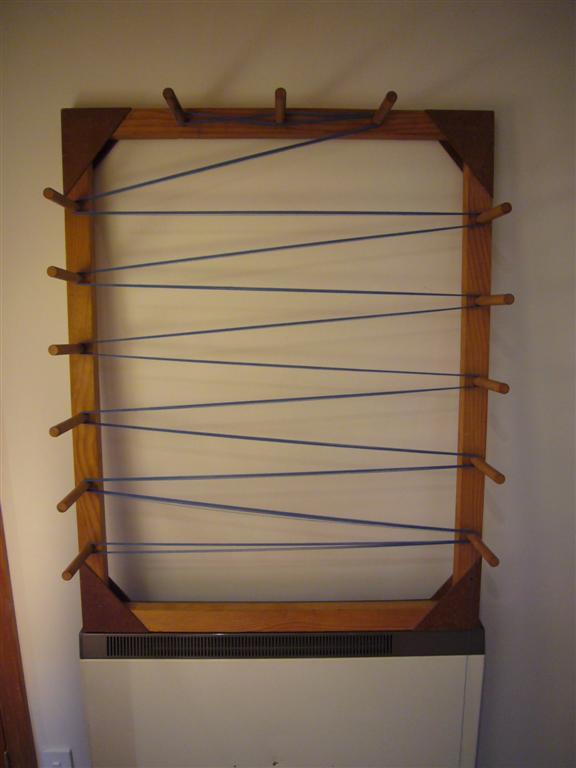
After I decided to use three colors in the warp, I measured the 498 warp threads on the warping board, by wounding a single warp thread at a time around all the pegs on the board; this way I would get roughly eight meters of warp, which should give me plenty to sample and two or three shawls. In my house, I have a wall-mounted heater at just the right height in the hallway, so I propped the warping board on it. Behind me to the right is the stairway, and I placed the cones of yarn on different steps; this way, the yarn is pulled straight up off the cones, over the railing, and onto the board, so the cones didn't topple or dance around.

As the warp threads accumulated, for the first time I saw the exact proportion of the yarns in the exact order they would be set up on the loom. Above is the busier half of the warp threads.

This measuring process took me about 90 minutes, with long breaks and frequent checking and rechecking and lots of counting.

How I Make a Shawl - Part 1: Planning/Designing

I'm often asked, "How long does it take to weave a shawl?"to which I have no quick answer. It depends on the purpose of the piece and/or the occasion of the gift, whether I know the person who will be wearing it and what I know about the person, the size of the piece and the yarn, the number of types and colors of yarns, weave structure (or pattern), and the loom, just to name a few. So, rather than giving you the days and hours I spent on a particular piece, I thought I'd take you on a short journey, of weaving two pieces from one warp in preparation of my Exhibit(ion).

Please note this is by no means a tutorial on how to weave. I am leaving out vital but boring technical information. And in weaving, there are always many different ways to accomplish the same thing; most weavers become comfortable over time with one method, which accommodates the body size, the loom type and size, the available equipment/assistance and space. (And this is also a disclaimer for my doing things other weavers and weaving teachers might cringe at if they only saw me.) I also lack confidence with proper weaving or design parlance, but with the help of a few photographs, I hope you get the feel of the work I do.

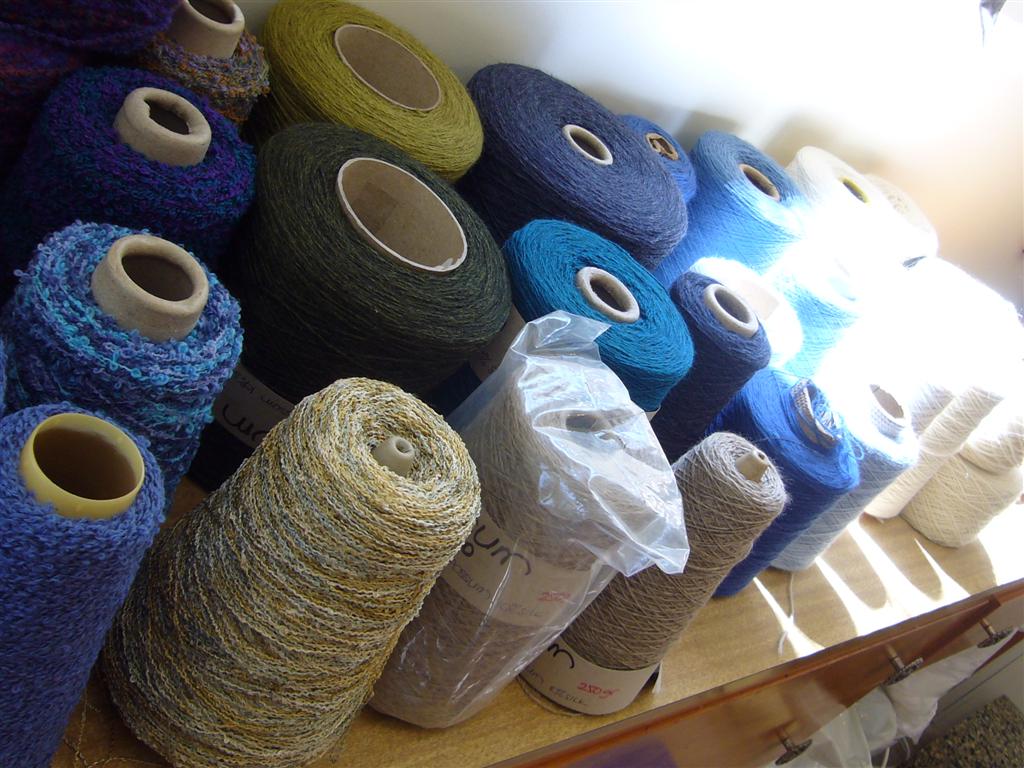
Unlike my usual work, (one-off pieces as special gifts or to be sent to juried exhibits), I need to weave a series of shawls which are interesting in their own right, but collectively not dissimilar, to give the Exhibit(ion) an visual cohesiveness. So I selected the sea as my theme. I placed cones of blue and white yarns all over the house so I was constantly looking at them and thinking about the theme.

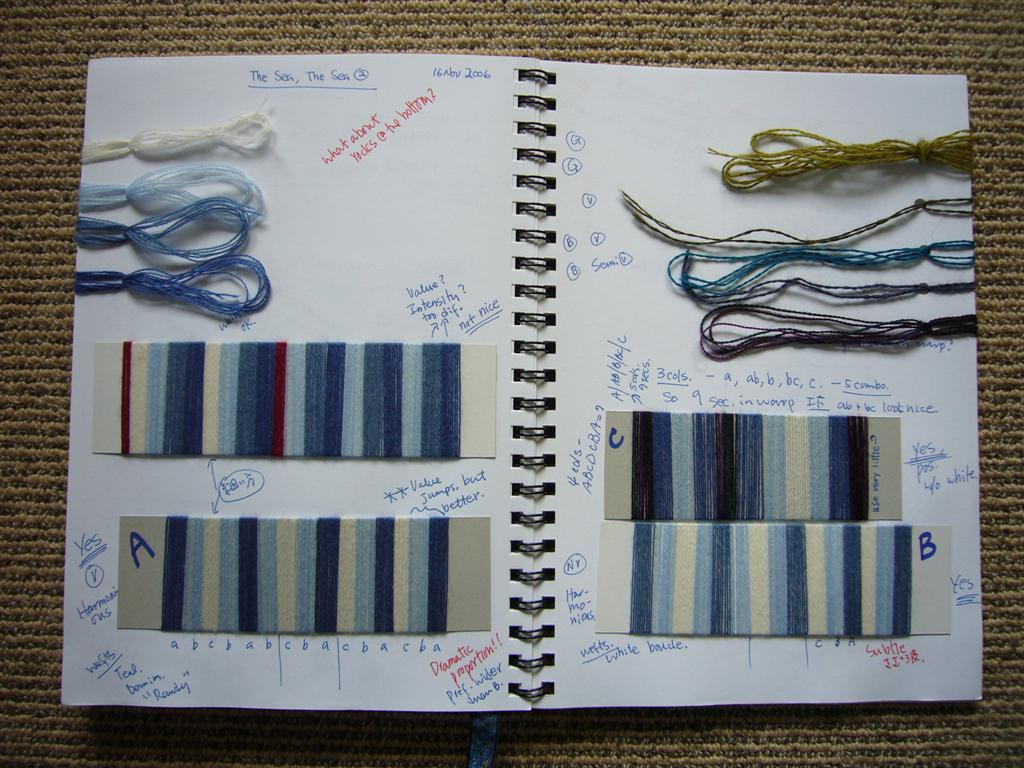
I narrowed down the yarns I can use as my warp (that is, the length-wise group of threads that will be 'attached' to the loom) and started playing with combinations. The small strips you see are called "wrapping", where warp candidates are wound around a small piece of cardboard. I don't usually do this, but because I needed to keep "the series" in mind and thought it best to keep good records, I made a few wrappings. The short time this took paid off as I did not like the look of my two mid-blues adjacent to each other (even though they look alright on cones sitting next to each other); the darker mid-blue was much more vivid/intense than the paler mid-blue. However the variegated powder blue looked good next to either mid-blue.

At the same time, I wanted to use my new knowledge of Fibonacci Sequence, so I had charts showing different proportions and arrangements, again, all over the house.

For the first warp, I decided to try the easiest option and place three colors, pale mid-blue, variegated powder blue, and undyed, to express waves on the beach. The order will be a simple repetition of mid-powder-undyed, and I need 494 warp threads for the design part, and two on each edges to secure, so a total of 498 warp threads. A more conscientious weaver might have colored in the chart or made a proportional wrapping, but I'm a waver, not a wrapper, so I moved on .

The design process is a long-drawn out one for me, because I see so many possibilities and I can't make up my mind. I started this about six months ago, and it will be on-going until I cut off the last piece from the last warp. From selecting the yarns for the first warp, deciding on the placement and proportion of the colors, and calculating the number of threads in each color took me approximately an half of an afternoon.

I'm an Old Timer Now

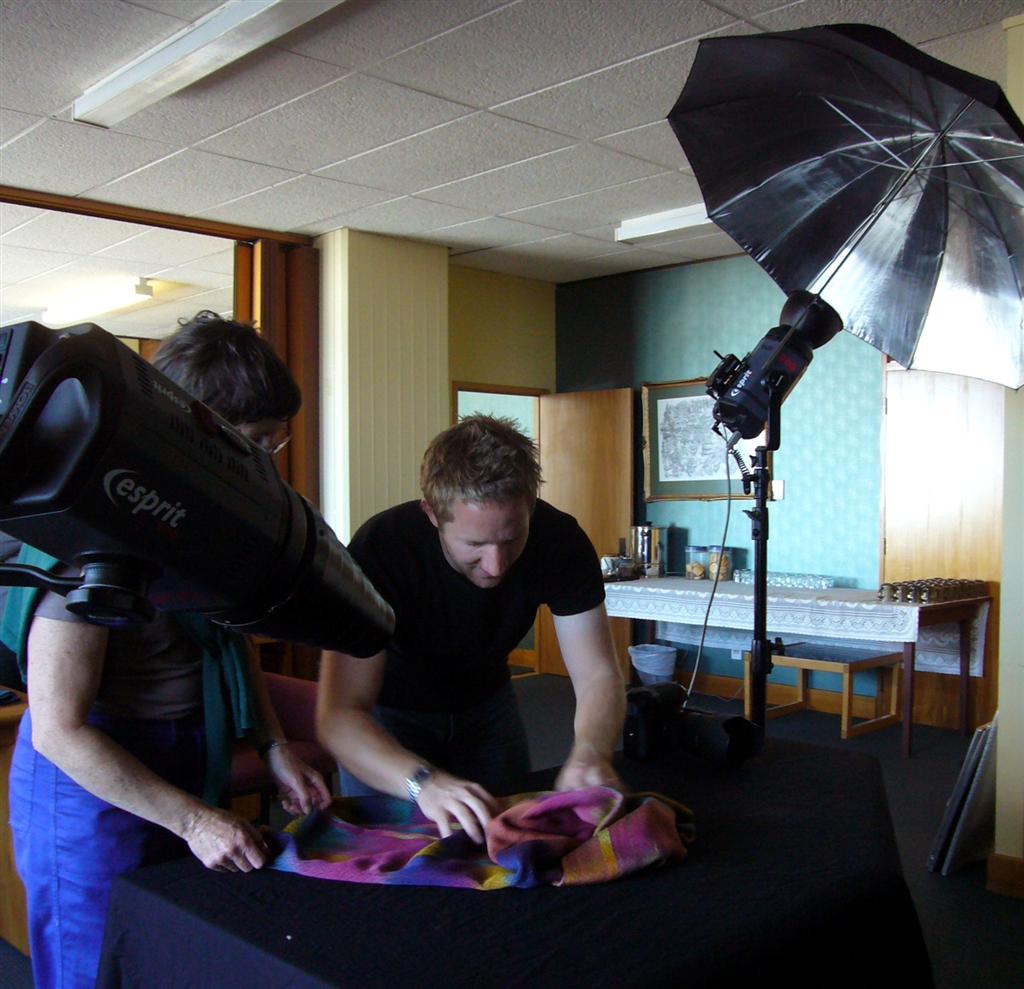
Remember Dan the Camera Man? We had another opportunity to get our work photographed by him today. Now that I'm so experienced in this process, I just gave him my shawls and scarves and left him to it, which in retrospect was such a waste of valuable learning opportunity. But I did get a few shots of Dan arranging Sue Broad's hand-painted silk fabric.

Sue is an experienced weaver who has recently moved to Nelson. How lucky am I to be able to access her wealth of knowledge now! This is only her debut in "Unravelling"; she will be making many return appearances here in the future, I hope.